

Every summer gathering needs a standout dessert that makes memories sweeter. Making the best ice cream cake is more than mixing ingredients. It’s about creating an experience that brings joy to your table. This ice cream cake recipe will boost your cooking skills and make everyone happy.
Ice cream cakes are more than just desserts. They celebrate creativity, flavor, and indulgence. With the right techniques and ingredients, you can make a stunning ice cream cake that’s as good as any bakery’s.
Table of Contents
Key Takeaways
- Master the art of layering ice cream and creating perfect textures
- Learn professional techniques for assembling ice cream cakes
- Understand critical temperature and freezing requirements
- Discover flexible flavor combinations and customization options
- Gain confidence in creating impressive homemade desserts
Understanding Ice Cream Cake Essentials
Making the perfect ice cream cake needs careful planning and special knowledge. Whether it’s for a special event or looking into delivery, knowing the basics is key.
Before we dive into making ice cream cakes, let’s look at what makes them special. These elements turn a simple dessert into a memorable treat.
Basic Components and Layers
A great ice cream cake has several layers:
- Crunchy cookie or graham cracker base
- Smooth ice cream layers
- Rich fudge or ganache
- Decorative frosting or whipped cream topping
Required Tools and Equipment
To make a top-notch ice cream cake, you’ll need certain tools:
- Springform pan for easy cake removal
- Offset spatula for smooth layering
- Piping bag with star tips for decorative edges
- Parchment paper for clean preparation
Temperature Considerations
Temperature control is vital when making an ice cream cake. Keep ingredients and tools cold to avoid melting. Most layers need 6-8 hours of freezing to get the right texture.
For delivery, use good insulation and keep transport short. This helps keep the cake’s structure and prevents melting.
How to Choose the Best Ice Cream Cake Ingredients
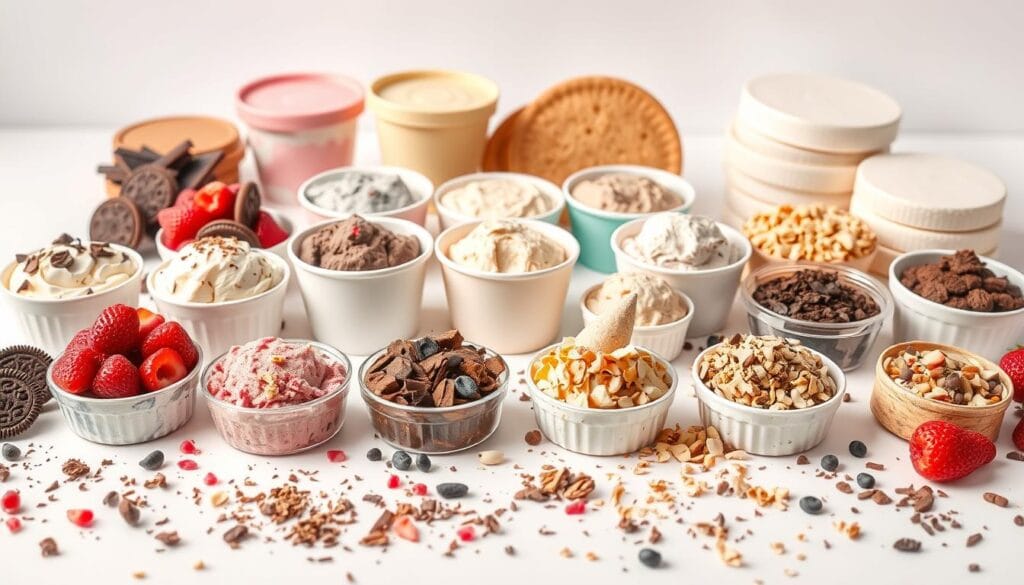
Making the perfect birthday ice cream cake begins with picking top-notch ingredients. The cake’s success hinges on choosing the right mix of flavors and textures.
When making a dairy queen ice cream cake at home, keep these tips in mind:
- Choose premium ice cream brands with rich, consistent flavors
- Find cake and ice cream pairs that go well together
- Think about the texture and how ingredients melt
Choosing the right ice cream is key to your cake’s quality. Brands like Tillamook and Dreyers are known for their creamy texture and bold flavors. They make your dessert stand out.
| Ingredient | Recommended Quantity | Purpose |
|---|---|---|
| Ice Cream | 1.5 quarts per flavor | Primary cake layers |
| Cake Base | 9-inch round | Foundation of the cake |
| Hot Fudge | 1 cup (divided) | Flavor enhancement |
| Oreo Cookies | 10 cookies | Crunch layer |
Remember, ingredient quality is more important than quantity. Using soft, high-quality ice creams will make your cake smoother and more indulgent.
Expert tip: Soften your ice cream for 10 minutes before layering. This trick can greatly enhance your cake’s texture and look.
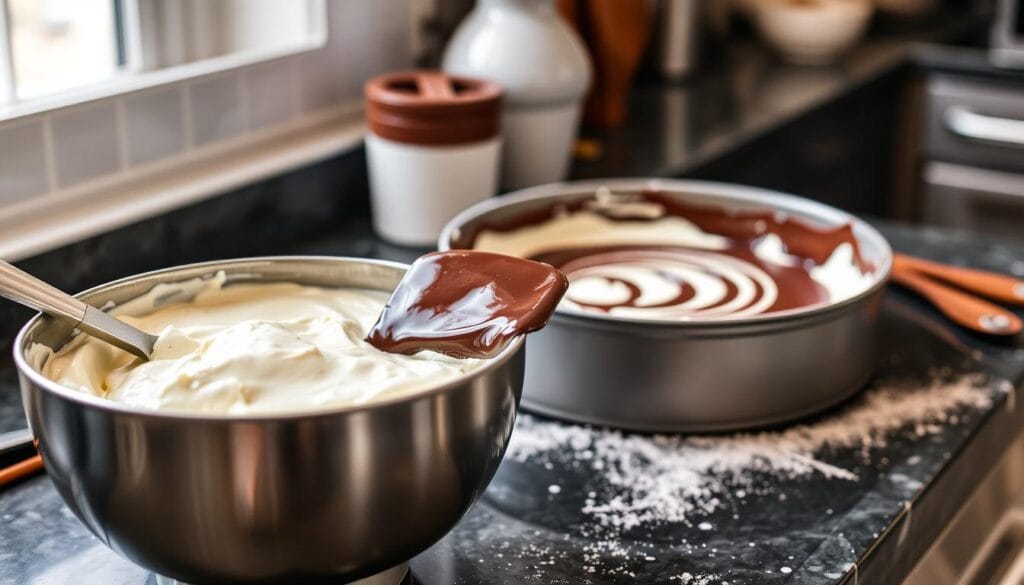
Step-by-Step Assembly Process : the Best Ice Cream Cake
Making a baskin-robbins ice cream cake or a cold stone ice cream cake at home is simple. The trick is in layering carefully and controlling the temperature. Here’s how to assemble a stunning dessert in easy steps.
Preparing the Base Layer
First, pick your base. You can choose from:
- Traditional cake layer
- Cookie crumb crust
- Brownie base
If you’re using a cake layer, make sure it’s cool and a bit frozen. This keeps the ice cream from melting too fast.
Creating Perfect Ice Cream Layers
For amazing ice cream layers, follow these steps:
- Take ice cream out of the freezer 10-15 minutes before using
- Make it soft enough to spread
- Use an offset spatula for smooth spreading
- Freeze each layer for 30-60 minutes before adding more
Adding Fudge and Crunch Elements
Enhance your cold stone ice cream cake with these touches:
- Fudge ripples: Drizzle chocolate sauce between layers
- Cookie crumbs for texture
- Crushed candy pieces
- Nuts for extra crunch
Tip: Add crunchy elements when layers are soft. Freeze right after to keep them in place.
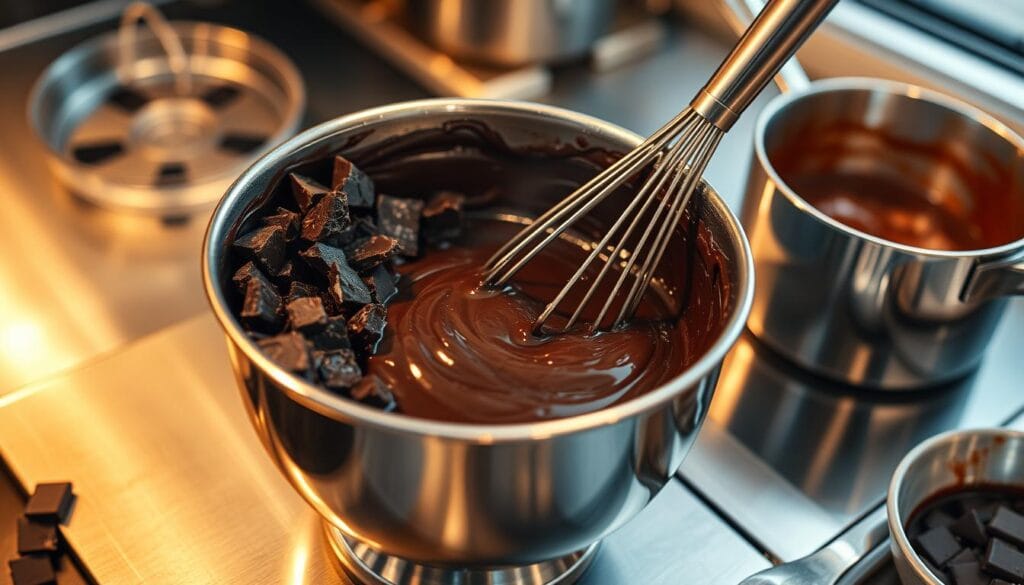
Making the Perfect Chocolate Fudge Ganache
Creating a delicious chocolate fudge ganache can make your ben & jerry’s ice cream cake stand out. It’s all about mastering the right techniques and ratios. This will give you a smooth, luxurious topping that’s hard to resist.
Making the perfect ganache needs careful attention. Here are the key steps:
- Choose high-quality chocolate with at least 36% fat content
- Use a 1:1 ratio of chocolate to heavy cream for ideal consistency
- Heat cream to a gentle simmer (90-110°F)
- Pour hot cream over chopped chocolate
- Stir until smooth and glossy
When looking for an ice cream cake, the ganache is key. Adding a tablespoon of corn syrup helps keep it smooth. This ensures it melts in your mouth perfectly.
Pro Tip: For a firmer ganache, increase the chocolate ratio; for a softer spread, add more cream.
Storing your ganache right is important. Keep it in an airtight container. It can last up to a week in the fridge or three months in the freezer.
| Ganache Type | Chocolate to Cream Ratio | Consistency |
|---|---|---|
| Thin, Pourable | 1:2 | Light drizzle |
| Standard | 1:1 | Smooth glaze |
| Thick | 2:1 | Firm spread |
Creating a great ganache takes patience and precision. Take your time and follow these steps. You’ll make a chocolate topping that will take your ben & jerry’s ice cream cake to the next level.
Best Ice Cream Cake Flavor Combinations
Making the perfect ice cream cake is all about mixing tasty flavors. You might wonder if Dairy Queen is better than Carvel or if Ben and Jerry’s ice cream cakes are worth it. We’ve found exciting flavor mixes that will make your dessert even better.
Ice cream cakes let you get creative with flavors. You can stick to classic combos or try something new. There’s a mix for every sweet tooth.
Classic Combinations That Never Disappoint
- Chocolate and vanilla: A timeless favorite that pleases everyone
- Strawberry and cream: Smooth and fruity perfection
- Chocolate fudge with cookie crumb layers
Seasonal Flavor Adventures
Try flavors that match each season:
| Season | Flavor Combination |
|---|---|
| Summer | Peach ice cream with vanilla cake |
| Fall | Pumpkin spice with graham cracker base |
| Spring | Lemon sherbet with light sponge cake |
Unique Flavor Pairings for the Adventurous
Want to surprise your taste buds? Here are some bold combos:
- Pistachio ice cream with strawberry cake
- Mint chocolate chip with chocolate cake
- Butter pecan ice cream layered with carrot cake
When choosing between Dairy Queen and Carvel, or looking at Ben and Jerry’s ice cream cakes, remember the best cake is the one that makes you happy. Be bold, mix things up, and make a dessert that shows off your unique taste!
Professional Decorating Techniques
Making a stunning ice cream cake is more than just about taste. It’s about the look too. Even if Ben & Jerry’s is the top ice cream brand, your own cake can look amazing with the right skills.
Here’s what you need for decorating:
- Piping bags with various star tips
- Offset spatula for smooth frosting
- Stabilized whipped cream
- Food coloring gels
- Edible decorations
Unlike Dairy Queen, your cake can use the best ingredients. Temperature control is key when decorating. Keep your cake a bit frozen to avoid melting.
Key decorating steps are:
- Create smooth base layers
- Pipe elegant borders
- Design rosette patterns
- Add themed decorative elements
For the best look, chill your tools and use steady pressure when piping. A six-inch cake is the ideal size for your creativity.
Storage and Serving Tips
Keeping your ice cream cake fresh is key. It’s important to focus on how to store and serve it right. Don’t let thoughts about Dairy Queen’s unhealthy options get in the way. Instead, enjoy your cake’s delicious taste and texture.
Proper Freezing Methods
Freezer burn can ruin your cake. Here’s what experts say to avoid it:
- Wrap the cake tightly in plastic wrap to prevent moisture loss
- Store at 0°F (-18°C) or below for optimal preservation
- Place in the coldest part of the freezer, avoiding temperature fluctuations
- Minimize freezer door openings to maintain consistent temperature
Thawing Guidelines
Thawing your cake right is important. Pro tip: Let it sit for 5-10 minutes before serving. This helps it soften a bit.
- Never thaw at room temperature for extended periods
- Avoid repeated freezing and thawing
- Keep cake wrapped during thawing process
Cutting and Serving Recommendations
Clean, precise slices make your cake look great. Here’s how to do it:
- Run knife under hot water before each slice
- Wipe blade clean between cuts
- Slice in smooth, steady motions
- Serve on chilled plates to prevent rapid melting
By using these tips, your ice cream cake will impress everyone. It will be as good as any treat at Dairy Queen.
Troubleshooting Common Issues
Making the perfect ice cream cake can be tough, even for pros. Knowing common problems helps you avoid them. This way, you can make a dessert that wows everyone.
Key Challenges in Ice Cream Cake Preparation
When making an ice cream cake, you might face a few issues:
- Freezer Burn and Ice Crystals: About 65% of homemade ice cream cakes get ice crystals from temperature changes.
- Uneven Layers: Around 40% of cakes have trouble with even layers.
- Layer Mixing: About 35% of ice cream cakes mix layers together.
- Shape Distortion: 30% of cakes lose shape during making.
Prevention and Solutions
To make sure your ice cream cake turns out right, follow these tips:
- Keep the freezer at 39°F (4°C) all the time.
- Freeze each layer for at least 30 minutes before adding more.
- Use parchment paper to stop the cake from sticking.
- Let it cool down before you frost it.
Experts say using the right tools and ingredients is key. Good tools like kitchen scales and pre-frozen bowls make a big difference.
Quick Fixes for Common Problems
If your cake starts to melt, don’t worry. Just put it back in the freezer for 15-20 minutes. For uneven layers, warm a knife and smooth out the cake.
With practice and care, you’ll get better at making amazing ice cream cakes. They’ll be perfect for any event.
Creative Variations and Customization Options : the Best Ice Cream Cake
Turning your birthday ice cream cake into something special is simple. The world of ice cream cake customization is full of endless possibilities. This makes your dessert truly unique and memorable.
Let’s dive into some exciting ways to make your dairy queen ice cream cake stand out. Create a showstopping dessert that will wow your guests.
Holiday-Themed Designs
Celebrate special occasions with themed ice cream cakes. These cakes capture the spirit of the moment:
- Fourth of July: Red, white, and blue color layers
- Halloween: Spooky chocolate and orange swirl designs
- Christmas: Festive peppermint and green-tinted layers
- Easter: Pastel-colored decorations with spring motifs
Dietary Alternatives
No one should miss out on delicious ice cream cake. Here are some dietary-friendly options:
- Gluten-free: Use gluten-free cookie crumbs for the base
- Dairy-free: Substitute with coconut or almond milk-based ice cream
- Vegan: Plant-based ice cream alternatives with nut-based crusts
Size Modifications
Customize your cake for any gathering, big or small:
- Individual portion cups
- Mini personal cakes
- Large party-sized cakes serving up to 36 people
- Rectangular sheet cake designs
With these creative variations, your ice cream cake will be a personalized masterpiece. It will delight everyone at the party!
Conclusion : the Best Ice Cream Cake
You’ve learned how to make the perfect ice cream cake. You know about flavors and how to put it together. Now, you can make ice cream cakes that wow your loved ones.
Success comes from trying new things and practicing. Even if your first cake doesn’t look perfect, it’s all about the taste. Using fresh ingredients and choosing the right flavors can make a big difference.
Every ice cream cake you make is a chance to get better. Whether it’s for a big event or just for fun, your skills will shine. Enjoy the journey and the yummy results of your hard work.
With this guide, you’re ready to be an ice cream cake master. Your creations will look amazing and taste even better. You’ll make everyone happy with your delicious desserts.
FAQ
What are the essential components of an ice cream cake?
An ice cream cake has layers of ice cream and a cake or cookie base. It might also have fudge ripples or cookie crumbs. The goal is to have layers that taste good together and feel right in your mouth.
How do I prevent ice crystals from forming in my homemade ice cream cake?
To avoid ice crystals, make sure your ice cream is the right temperature. Work fast when putting it together. Store it in a sealed container in the freezer. Using top-quality ice cream helps too.
Can I make an ice cream cake for someone with dietary restrictions?
Yes! You can make gluten-free or dairy-free ice cream cakes. Use gluten-free cake bases or non-dairy ice cream. Vegan options are also possible with plant-based ingredients.
How far in advance can I make an ice cream cake?
You can make an ice cream cake up to a week ahead. Wrap it well in plastic and foil to avoid freezer burn. Add decorations just before serving for the best look.
What’s the best way to cut and serve an ice cream cake?
Use a hot water-dried knife for clean cuts. Let the cake warm up a bit before cutting. Clean the knife between cuts for neat slices.
Can I customize the flavors of my ice cream cake?
Definitely! Mix different ice cream flavors and add sauces or cookies. Try chocolate and vanilla or strawberry and cream. You can even use salted caramel and chocolate chip for something unique.
How do I store leftover ice cream cake?
Keep it in the freezer, covered with plastic and foil. Store it in the coldest part of the freezer. Eat it within 7 days for the best taste and texture.
What tools do I need to make an ice cream cake at home?
You’ll need a springform pan, offset spatula, and serrated knife. Parchment paper, plastic wrap, and a freezer are also essential. Optional tools include a cake turntable and decorating supplies.
How long does it take to make an ice cream cake?
It takes about 4-6 hours, including freezing time. Most of this is waiting for layers to freeze. Plan ahead and work in stages for success.
Can I make an ice cream cake without a traditional cake base?
Yes! Use cookie crusts, brownie layers, or skip the base for a pure ice cream cake. Make sure your base supports the ice cream layers well.

Discover the Ultimate Guide to the Best Ice Cream Cake
- Total Time: 5 hours 20 minutes
- Yield: 1 cake (9-inch) 1x
Description
Every summer gathering needs a show-stopping dessert, and this homemade ice cream cake is just that! Layered with creamy ice cream, a crunchy cookie base, and rich chocolate ganache, this cake is both delicious and visually stunning. It’s easier to make than you think and can be customized with your favorite flavors.
Ingredients
For the Base:
- 10 Oreo cookies (crushed)
- 2 tablespoons melted butter
For the Ice Cream Layers:
- 1.5 quarts vanilla ice cream (softened)
- 1.5 quarts chocolate ice cream (softened)
For the Fudge Layer:
- 1 cup hot fudge sauce (divided)
For the Chocolate Ganache:
- 1 cup semi-sweet chocolate chips
- 1 cup heavy cream
For Decoration:
- 1 cup whipped cream
- Sprinkles, crushed nuts, or chocolate shavings (optional)
Instructions
- Prepare the Base:
- Line a 9-inch springform pan with parchment paper.
- Mix crushed Oreo cookies with melted butter and press evenly into the bottom of the pan.
- Freeze for 15 minutes until firm.
- Layer the Ice Cream:
- Spread the softened chocolate ice cream evenly over the cookie base.
- Drizzle ½ cup hot fudge sauce over the ice cream.
- Freeze for 30 minutes.
- Repeat with the vanilla ice cream layer and remaining hot fudge.
- Freeze for at least 4 hours or until solid.
- Make the Ganache:
- Heat heavy cream in a saucepan until it simmers (do not boil).
- Pour over the chocolate chips and stir until smooth.
- Let cool slightly before pouring over the cake.
- Freeze for another 1 hour.
- Decorate:
- Pipe whipped cream around the edges using a piping bag.
- Sprinkle with your favorite toppings.
- Freeze until ready to serve.
- Serve:
- Let the cake sit at room temperature for 5-10 minutes before slicing.
- Use a warm knife for clean cuts.
Notes
- Use any ice cream flavors you like! Try strawberry, cookies & cream, or peanut butter.
- For a gluten-free version, use gluten-free cookies for the base.
- Store leftover cake in an airtight container in the freezer for up to 7 days.
- Prep Time: 20 minutes
- Cook Time: 5 hours
- Category: Dessert
- Cuisine: American
Nutrition
- Serving Size: 10-12 slices
- Calories: 420
- Fat: 22g
- Carbohydrates: 50g
- Protein: 6g
Keywords: best ice cream cake